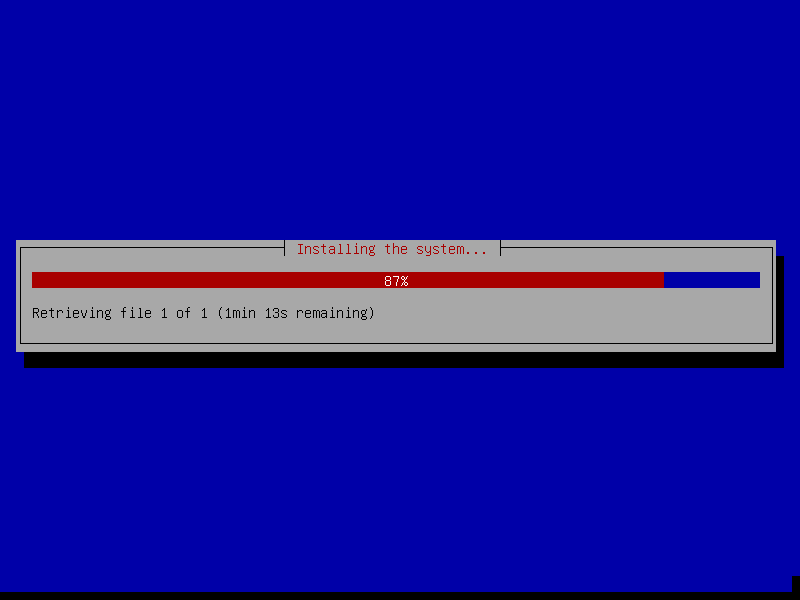
- 安裝OMV時如果沒有可用的網絡,OMV會讓你指定對應的Rounte IP用於聯網。將VirtualBox的網絡設置為NAT后順利繼續安裝。從上圖可知安裝時會抓取或更新安裝的組件包。
- 雖然定位不同,OMV和Proxmox的界面風格完全不同。OMV更傾向於家用,簡潔,直觀,不需要多少文檔,開箱能用。
- 是不是該嘗試下FreeNas(TrueNas)來和OMV比較一下?
在准备正式启用Proxmox之前,需要对ZFS, Raid-1,备份等操作作验证操作时,可以使用Virtualbox工具熟悉与测试。
为了简化设置, 所有的网卡都可以在VirtbualBox设置为”Host Only Adapter”。以下是Virtualbox的网络连通性表(源自Virtualbox Manual):
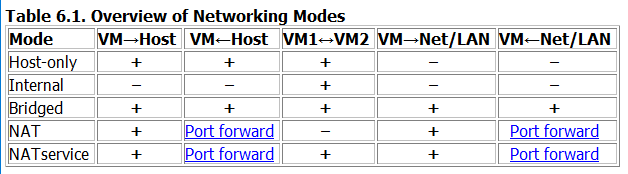
如果是单PVE+单PBS(Proxmox Backup Server)的测试场景,VM1<->VM2在Host-only模式下完全够用。
Pre-conditions:
/dev/sda -- existing good disk
/dev/sdb -- exiting bad disk to be replaced
/dev/sdc -- new disk
Reference
https://hosting-tutorials.co.uk/tutorials/linux/replacing-a-zfs-root-disk-with-proxmox
https://pve.proxmox.com/wiki/Host_Bootloader#sysboot_proxmox_boot_setup
https://pve.proxmox.com/wiki/ZFS_on_Linux#_installation_as_root_file_system
Steps
Replace disk on root zfs raid-1

zpool offline rpool /dev/disk/by-id/ata-VBOX_HARDDISK_VB8b4872d1-c28eed93 # Offline the bad disk
fdisk -l # Check new disk is presenting
sgdisk /dev/sda -R /dev/sdc # Copy partition table from sda to sdc
sgdisk -G /dev/sdc	# Same - Randomize the disk guids  #>sgdisk --randomize-guids /dev/sdc	# Randomize the disk guids
#grub-install /dev/sdc --NOT work on new Proxmox version, check following new command(not verified)
#check partitions of sdc first -- there're 3 partitions now
proxmox-boot-tool format /dev/sdc2
proxmox-boot-tool init /dev/sdc2 # to be verified
#proxmox-boot-tool init /dev/sdc2 grub # may be work on old version of proxmox
proxmox-boot-tool refresh # add/update new UUID to /etc/kernel/proxmox-boot-uuids
proxmox-boot-tool clean # clean unused UUID in /etc/kernel/proxmox-boot-uuids
reboot	#make sure system can boot normally
# Resize disk(parted) at this point
zpool replace -f rpool /dev/disk/by-id/ata-VBOX_HARDDISK_VB8b4872d1-c28eed93 /dev/disk/by-id/ata-VBOX_HARDDISK_VBdb5f453c-7a4145b7-part3 # replace bad disk with new disk's partition 3, DO NOT rebook before resilvering was done.

# Reference:
# Resize disk on root zfs raid-1
# 1st Try
zpool offline rpool ata-VBOX_HARDDISK_VB8b4872d1-c28eed93
fdisk /dev/sdc
	d
	3		#delete /dev/sdc3 partition
	n
	3
	(Enter)
	(Enter)	#create new partition /dev/sdc3 with all rest size
	t
	157		#change sdc3 partition type to "Solaris /usr & Apple ZFS"
	p
	w
zpool online rpool ata-VBOX_HARDDISK_VB8b4872d1-c28eed93
#wait until reslizer done and do the same on another raid-1 disk.
# 2nd Try
# Maybe this is the correct way to resize the disk:
# https://blog.doussan.info/posts/how-to-expand-a-zfs-pool-partitions/
parted /dev/sda
	print
	resizepart 3 100%
	print
	q

Notes:
1. Feel like bootable ZFS raid-1 (zpool) should contains 3 partitions: sdc1 sdc2 is used for boot, sdc3 is actually data partition.
2. Additional commands to perform for partition table copy and bootable partition setup
3. There's no easy way to replace the bootable raid-1/mirror or on GUI -- maybe I can try another open source solution(OMV) to see if that's better?
Note or Summary
课程目标:通过工具,设计和动手解决身边遇到的问题
课程准备:铅笔与白纸(或本子),剪刀,胶水,硬纸板(废旧纸盒),TinkerCAD账号,3D打印机,所有可用的资源
课程安排
第1课时(收集,分析,寻找方案)
第2课时(实现:设计,制作,反馈,改进)
第3课时(成果展示与总结)
附录
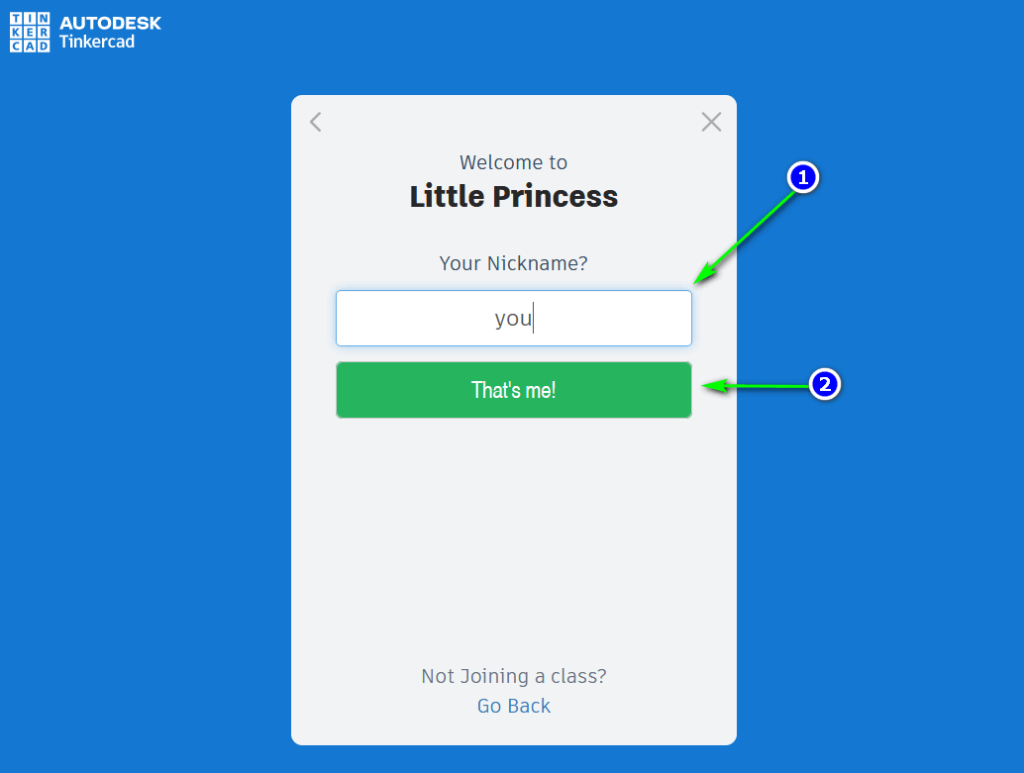
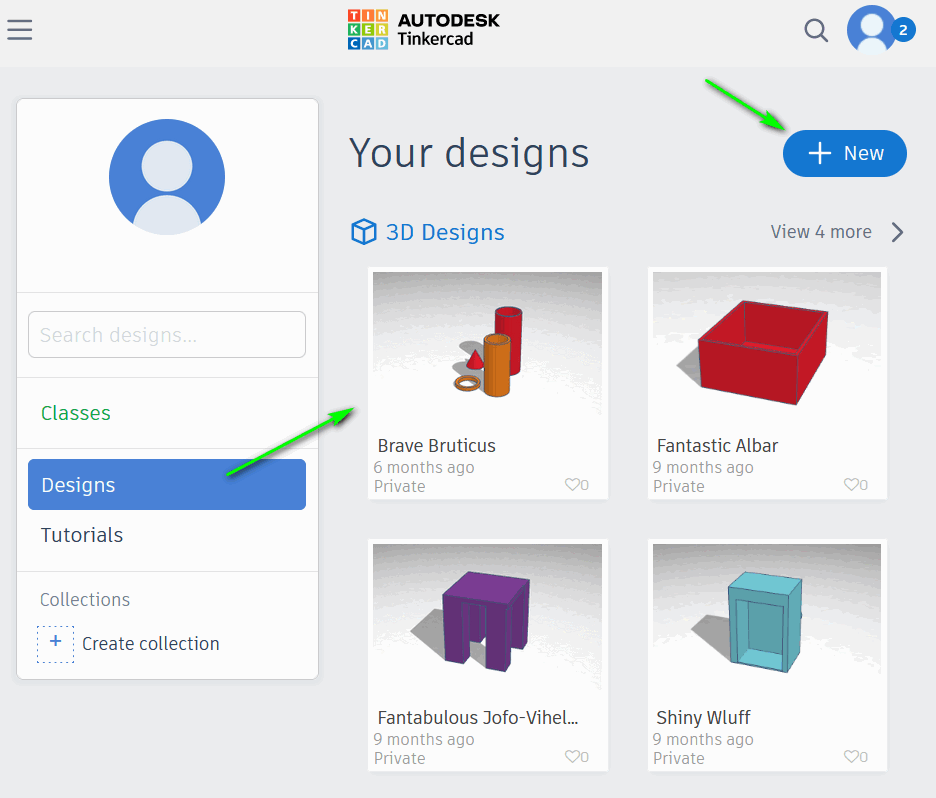
TinkerCAD账号 使用方法
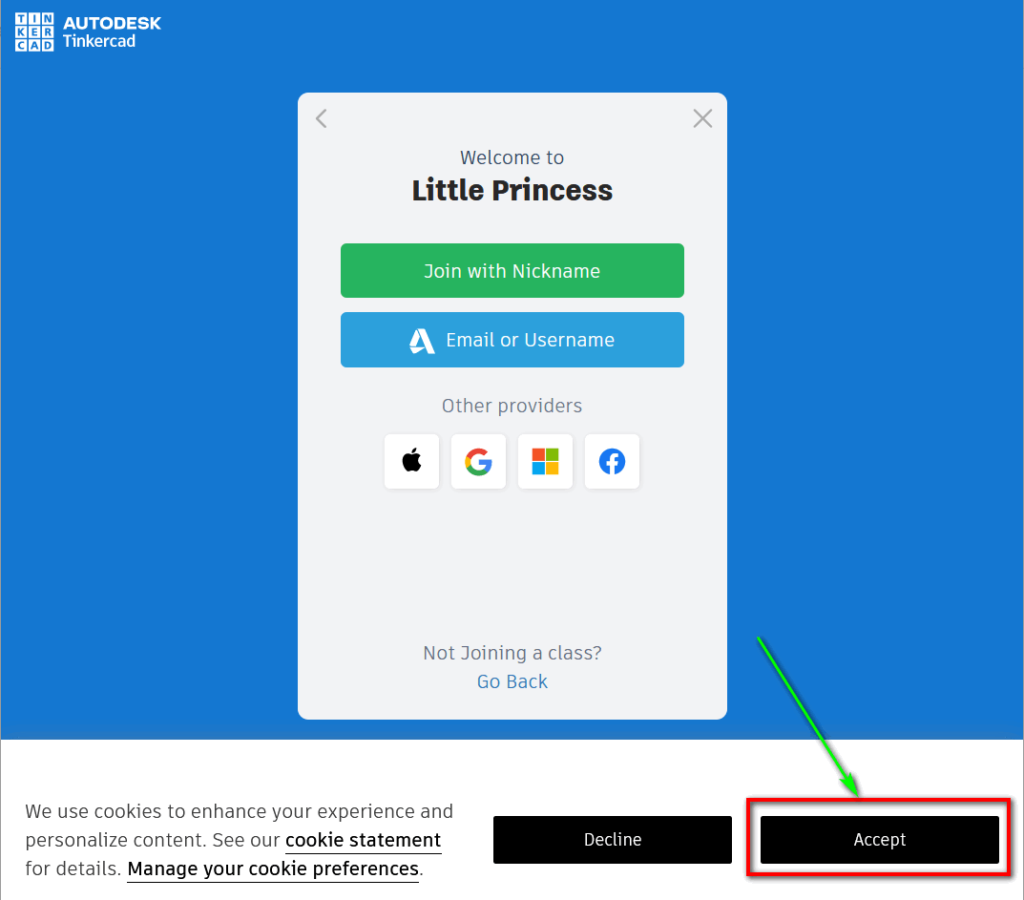
打开 TinkerCAD 课程地址
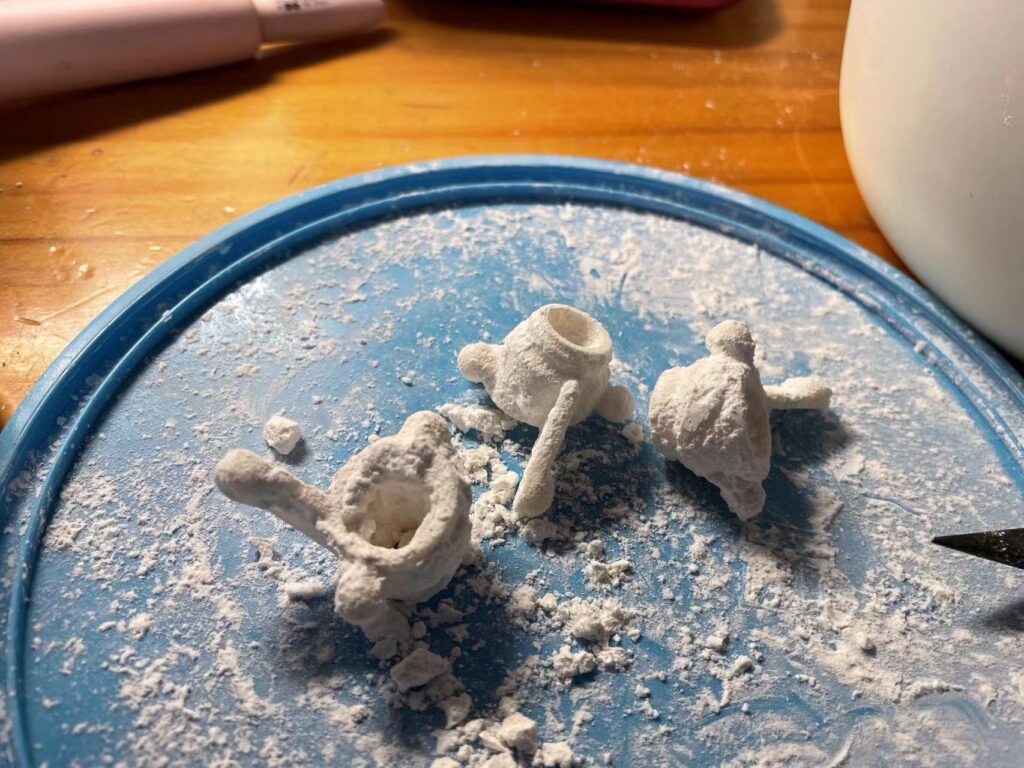
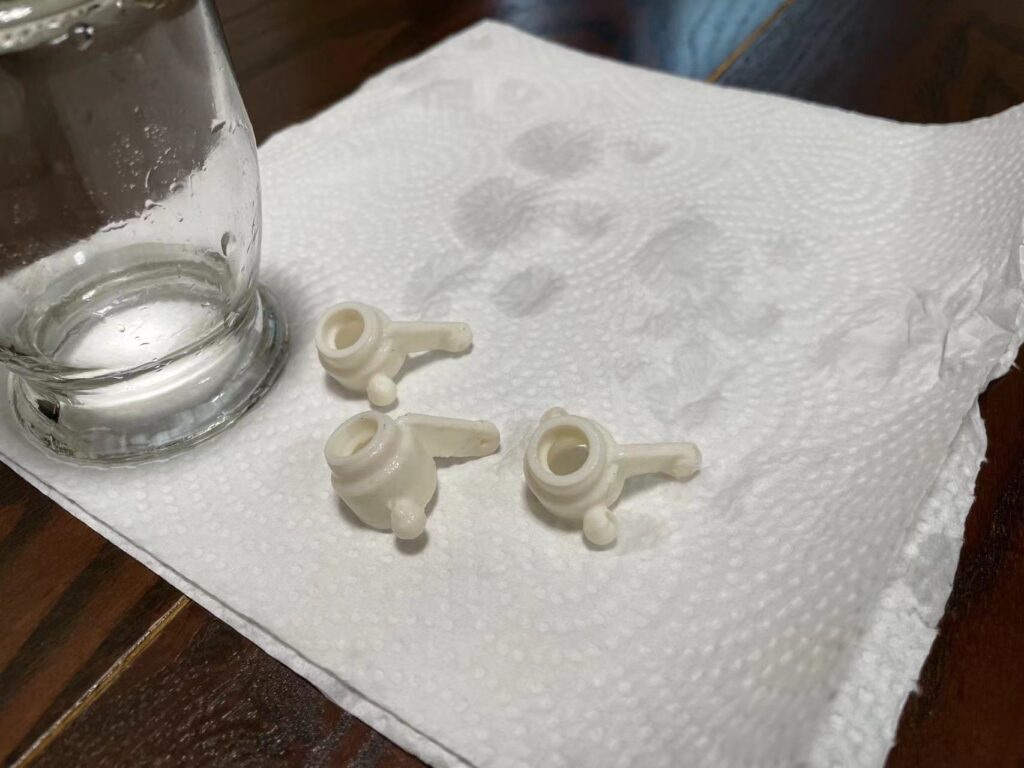
经过几次测试,盐卤重铸的塑料件感觉硬一些。加工参数:
存在的问题:
下一步实验:
经过两天的客户现场调试,终于找到了TCP Socket Client无法抓取返回报文的解决方法。接下来就是设计流程,重新整理代码了。虽然折腾一周的代码大部分需要重写,但是现场调试和熟读已有代码还是有必要的。
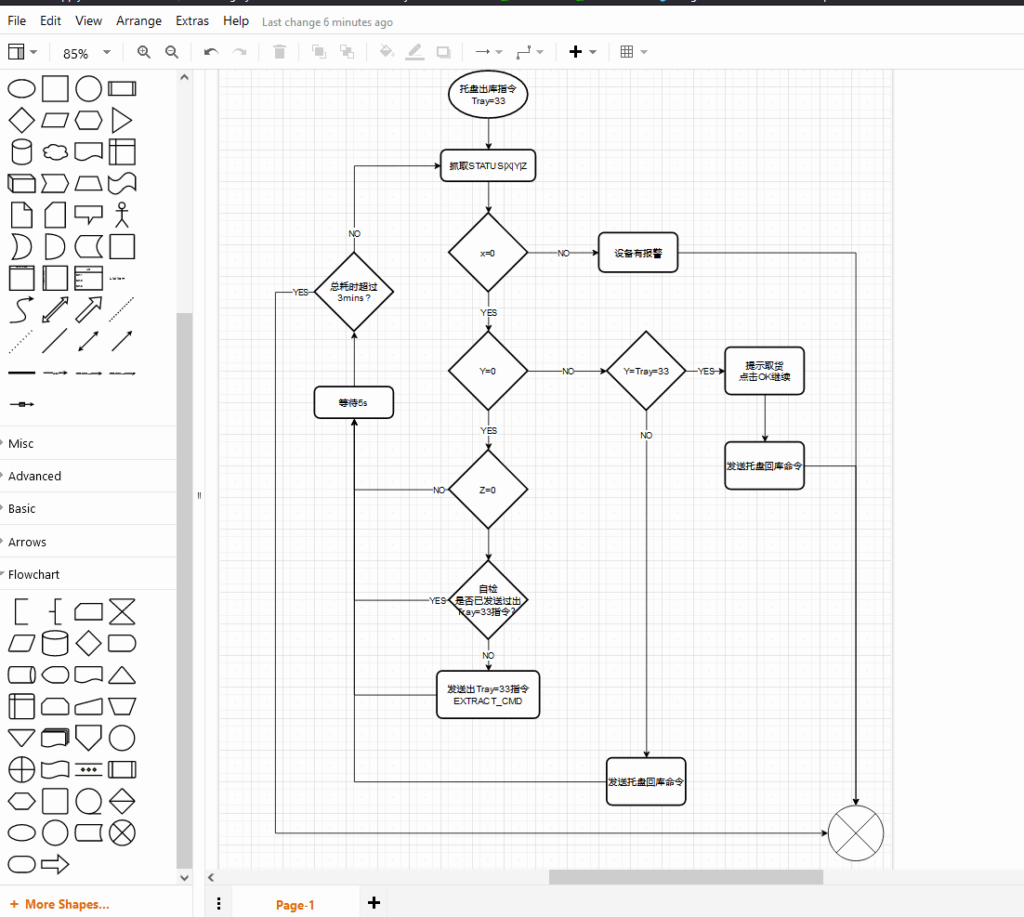
经验总结:
试了下热腔打印(食品烘干机+纸箱+隔热垫DIY的)。粘的太牢导致模型部分黏在平台铁面上只能用刀刮下来。
打印条件:
问题:
下一步计划:
剩余一堆Mendel i2和2020型材,想做另一台3D打印机。
现有结构材料BOM
| ID | Name | Size | Count |
| 1 | 2020 T | 400mm | 1 |
| 2 | 2020 T | 330mm | 2 |
| 3 | 2020 T | 300mm | 2 |
| 4 | 2020 T | 240mm | 2 |
| 5 | M8光杆 | 330mm | 4 |
| 6 | M8光杆 | 320mm | 2 |
| 7 | M8螺纹杆 | 310mm | 2 |
| 8 | M8丝杆 | 200~400mm | 若干 |
入选机型
需求
选用/用完现有结构材料
热床尺寸200x200mm 或者 150x150mm
可打印PLA,ABS
稳定而有一定的扩展性(使用各种挤出机,喷头,温腔)
机型比较
| 机型 | 优点 | 缺点 | 打分与评论 |
| Prusa i3 MK2 | 结构稳,资料全,打印面积大 | 主框架需要额外切割板 | 3.5/5 |
| Prusa mini clone | 结构一般,资料全而新,可使用已有挤出机 | 打印平台有限制 需要修改 | 3.5/5 |
| Bonsai | 结构稳定,资料全 | 只使用2020 T 尺寸限制只能用150x150mm热床 | 3.5/5 |
| Mendel90 | 结构稳定,资料一般,扩展性强 | 需要额外切割板 用不到大部分结构材料 | 3/5 |
| iTopie | 同上 | 同上 | 3/5 |
| Abapto | 结构稳定,资料一般 | 只使用2020 T且尺寸限制只能改装 | 3/5 |
结论
没有最终选定,但有功能趋向(优先级):
首选i3和Prusa i3通用X轴机型
从上到下。
某宝不知名蓝色ABS
食品烘干机作为耗材存储箱
树莓派4B – Octoprint
小鲁班3D打印机
MK8近程挤出
40mm M6带PTFE喉管
MK8加热块
E3D喷头
122x122mm软胶磁性垫(BuilTek?)热床
喷头230°C
热床95°C
自制了打印温腔:35x35cm的硬纸盒,内贴1cm保温隔热垫。
热床加热到95°C保持半小时,测温(喷头)到35°C环境温度后开始启动打印
小物件基本不需要胶水(raft没有任何翘边),目视打印件层间结合不错
下一步计划
温腔加热到40-80°C
无Brim/Raft
PEI钢板热床
其他材料HIPS,ABS+,PA,PC