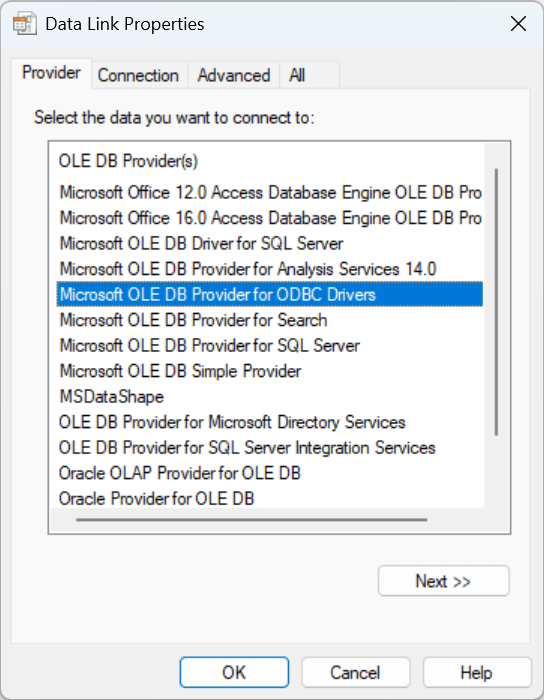
Database connection flow:
- TDM > ODBC(32bit) > Microset(Haimer Presetter Software)
- Microset is using following connection String:
- Provider=MSDASQL.1;Persist Security Info=False;User ID=tms;Data Source=TDMSQL32
- MSADSQL.1 is the “MS OLE DB Provider for ODBC Drivers”
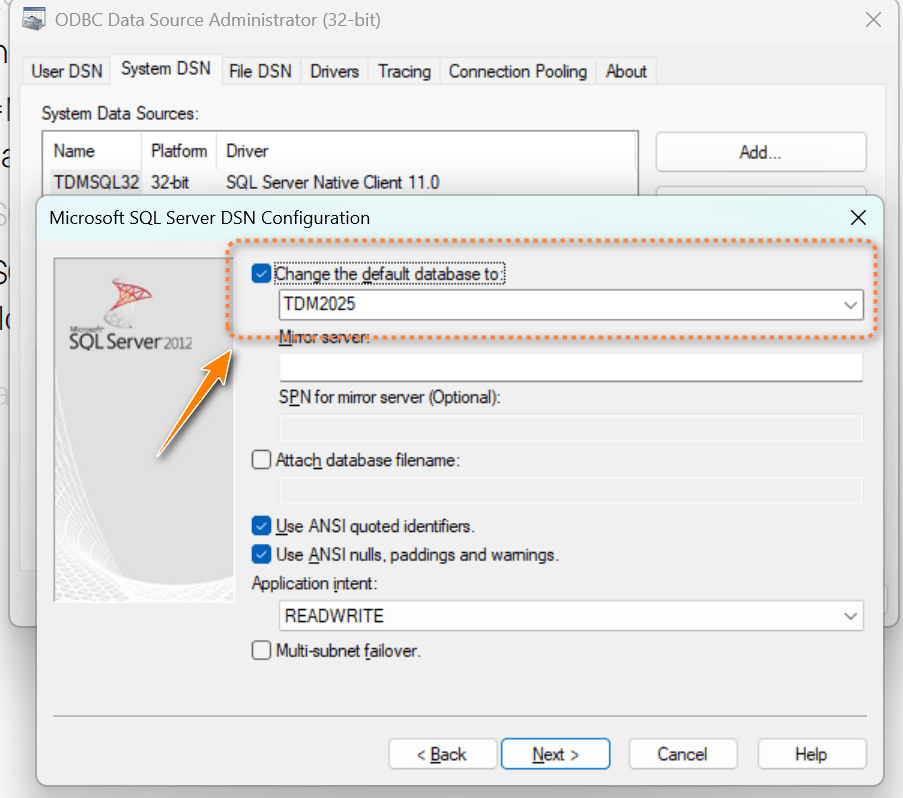
- TDMSQL32 is the 32bit ODBC System DSN
- TDMSQL32 shall be specified with default database
- Provider=MSDASQL.1;Persist Security Info=False;User ID=tms;Data Source=TDMSQL32